SAP HANA Cockpit 2.0 – Installation and configuration

SAP HANA Cockpit is a Web-Based  tool for administration, monitoring and maintenance of SAP HANA systems.

Below we discuss installation steps and some key points with respect to cockpit:

  1. Download the required SAP file from SAP Market Place.cockpitdown
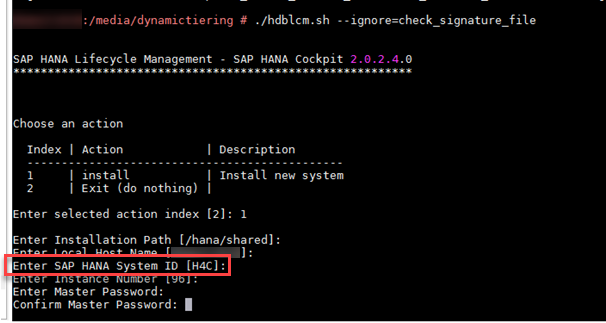
  2. Extract the SAR file and trigger installation using hdblcm.
    Note that installer installs a HANA instance (Express edition) of its own.
    More details hereco1
  3. Verify the details, enter the password and continue. Like any HANA installation user SYSTEM is created on the DB which will be used to login to Cockpit also.
    Along with SYSTEM, the other key user created is COCKPIT_ADMIN.
    co2.png
    Note that 51021 and 51023 are the default ports for Cockpit and Cockpit manager respectively.
  4. First it is required to login to Cockpit manager to assign yourself required roles using user COCKPIT_ADMIN.
    co3
    CO4
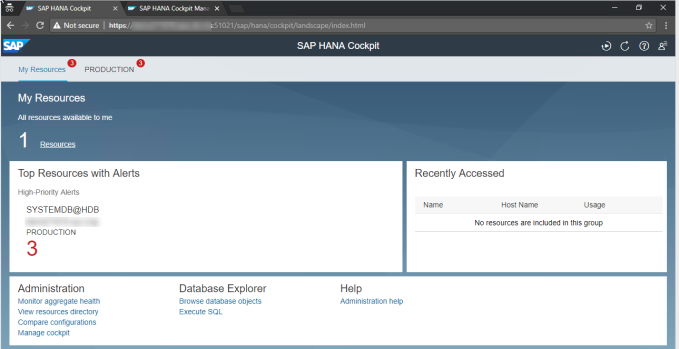
  5. Now you are ready to login to the HANA Cockpit.
    co5
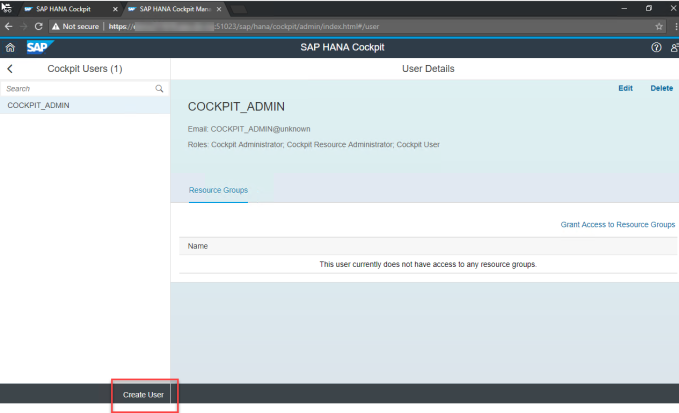
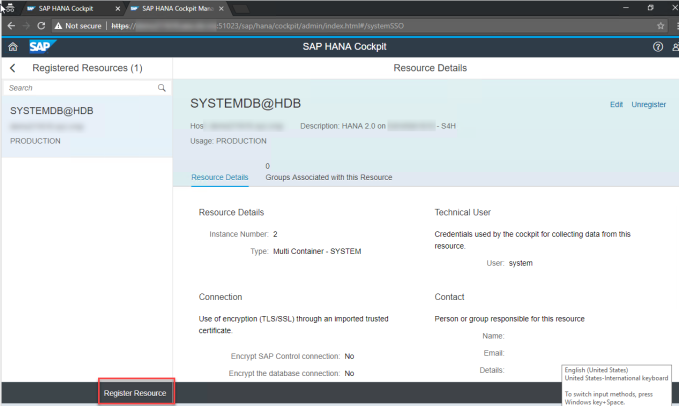
  6. If you want to add additional users or resources (HANA systems) to cockpit, you can do so via SAP HANA Cockpit manager.
    co6
    co7


Important SAP Notes:

2496215 – You’re not authorized to open the SAP HANA Cockpit

2618617 – Launching SAP HANA Cockpit 2.5.5 in Firefox

2496215 – You’re not authorized to open the SAP HANA Cockpit

2185556 – FAQ: SAP HANA Cockpit

2595496 – Register a Resource in HANA Cockpit

2149157 – Unable to access the SAP HANA Cockpit due to error “Failure – Unable to load groups”.


Stop Sybase ASE – Linux

If you want to shutdown backup server also, make sure too shut it down first, as you will not be able to login to isql if you shutdown main server first.

Login to isql to shudown the ASE database and issue command “shutdown”

shutdownbak

Then you can shutdown the ASE database instance.

shutdown

You can opt to kill the processes (For example: If you dont have password to login to isql). But this is not the most safer way. Please use this option only if you are not able to login to isql.

killase

Dont use -9 option. This might not allow uncommited DB transactions to rool back in a proper way.


System Copy – Sybase ASE

It is one of the most simplest system copies i have ever done. Ensure that Source and Target databases are running on the same release.

No need to uninstall the application or perform a rename using SWPM

I have not mentioned the pre and post processing steps as they are common to all databases and it will differ from customer and customer based on their system usage.

Once you have completed the pre-processing , perform the below steps.

I will assume “TRG” as your target database and “SRC” as your source database.

  • Copy the latest full backup file and required transaction backup files to the target server
  • Stop SAP Application on the target server.
  • Login to SQL/ISQL using “sa” or “sapsa” user ID on target server.
  • Drop the target database using below command. This might take few minutes based on database size.

drop database TRG

  • Create database TRG using below command.

create database TRG on TRG_data_001=’398743M’ log on TRG_log_001=’20480M’ for load

Note:

  1. Size used above are depiction only. This should be equal to or more than your source device sizes.
  2. Replace the device names TRG_data_001 and TRG_log_001 with appropriate device names.
  • Now load the created database using the source backup using below command.

load database TRG from “D:\backup\SRC.dmp”

Note: Assuming “D:\backup\SRC.dmp”. This might take some time based on the source backup size.

  • Now load the log backups to perform point in time recovery using below commands.

load transaction TRG from “D:\logbackup\SRC_001.trn”

load transaction TRG from “D:\logbackup\SRC_002.trn”

etc…

  • Bring the restored database online.

Online database TRG.

Now you are all set to start SAP and perform post processing.


Note: Even though i have not mentioned pre and post steps here, do remember to make the rdisp/wp_no_btc to 0 in your profile parameter before starting SAP.


Important Notes:

2542361 – System copy/migration with sybase database – SAP ASE for BS

1697542 – SYB: System copy with target SAP Adaptive Server Enterprise


Configuring SSFS for Oracle database

Why?

If you are not new to SAP on Oracle you must know how the authentication between SAP and Oracle used to work (OPS$ Mechanism).

In this method the user OPS$<SIDADM> which is authorized by <SID>ADM will log in to database to retrieve the encrypted password for the schema user stored in the database table OPS$<SIDADM>.SAPUSER. Now the application will use the credentials retrieved to log into the database.

This method was potentially considered to be insecure and is not supported by Oracle after release 11g.

The connect to the Oracle database using the OPS$ method contains a vulnerability that makes it possible for a malicious user to log on to the database as an OPS$ user without entering a password unless relevant measures are taken into consideration.

You can find more information about this in the blog below:

http://scn.sap.com/community/oracle/blog/2012/10/15/sunset-for-ops-mechanism-no-more-supported-by-oracle-not-used-by-sap

What?

SSFS (Secure Storage in File System) is a mechanism for storing the credentials required for application (SAP) to log into the database in the file system instead of database itself. This mechanism has been introduced by SAP from Kernel 7.20.

All SAP systems which will use future versions after oracle 11g can be operated with SSFS only.

How?

SSFS Implementation – Oracle SAP