You can find many blogs and videos about setting up SSO with Kerberos authentication on SAP GUI. With “SNCWIZARD” this has become a real simple procedure.
SSO can be configured even if SAP is running on a different domain than your end user’s computer or even if it is not attached to a domain.
This is because SAP GUI acts as a communication agent between SAP application and your AD and there is no direct communication between SAP application and AD for authentication.
- Upgrade the Cryptographic library to latest level.2450794 – How to update CommonCryptoLib in an ABAP system.Following files are extracted from cryptographic library SAR files.
 Make sure that the Kernel is upgrade to latest level or at least the above files are at latest level.
 - Check if you need to install the following SAP Notes based on your existing SAP support pack level .2516329 – “Kerberos library was not loaded” error when accessing SPNEGO transaction
2304831 – Programs fail after CCL 8.5 is installed - Create User Principal Names and corresponding Service Principal names on your Active Directory.
- Run transaction “SNCWIZARD”
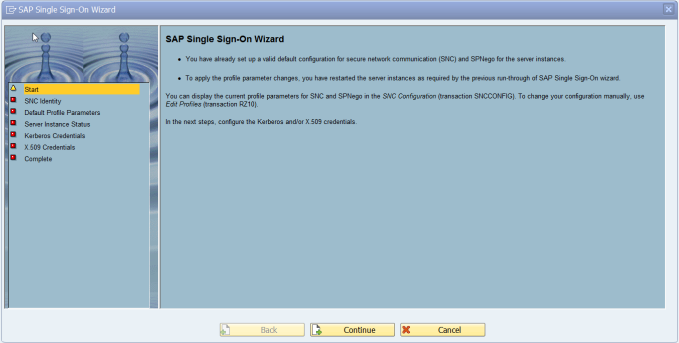
 Verify that all the relevant parameters are set appropriately.

Wizard will tell you if you will need a restart in the next step:


on the next screen you are directed to SPNEGO to enter AD user and Password.

Complete the configuration wizard.

- Install SSO Login client on end user laptop.

Test the connection to AD using SPNEGO transaction.
- Now you can map the SAP users to users from SU01.

- Now change the SAP GUI to use SSO

Now users should be able to login to SAP without using User ID and Password.
1323391 – What are the Microsoft requirements to perform kerberos SSO in multiple AD forests environments with BI
2429438 – Transaction SNCWIZARD / SNCCONFIG does not exist
2500444 – Transaction SNCWIZARD – SNC product not supported
2516329 – “Kerberos library was not loaded” error when accessing SPNEGO transaction
2564084 – SNC Kerberos Configuration for SAP GUI troubleshooting – Guided Answers